Frequently asked questions
Can't find what you're looking for? Go back to your cases or reach out through the Help button in the toolbar.
Exporting & PDFs
Open the case and click Export in the top action bar (next to + Add).

Two things have to be true first:
- The vault must be unlocked. If you see a 🔒 Locked badge like in the screenshot above, click it and enter your passphrase — evidence titles show as (Encrypted item) until you do, and export won't have anything readable to include.
- Your plan needs to include export. PDF export is included on Pro and Court-Ready, or with a one-time Case Report purchase for that specific case if you're on the free plan. See What's the difference between plans? below.
Once both are true, clicking Export opens a dialog where you choose what to include — date range, sort order, which evidence types, whether to include AI summaries or a table of contents, and so on.
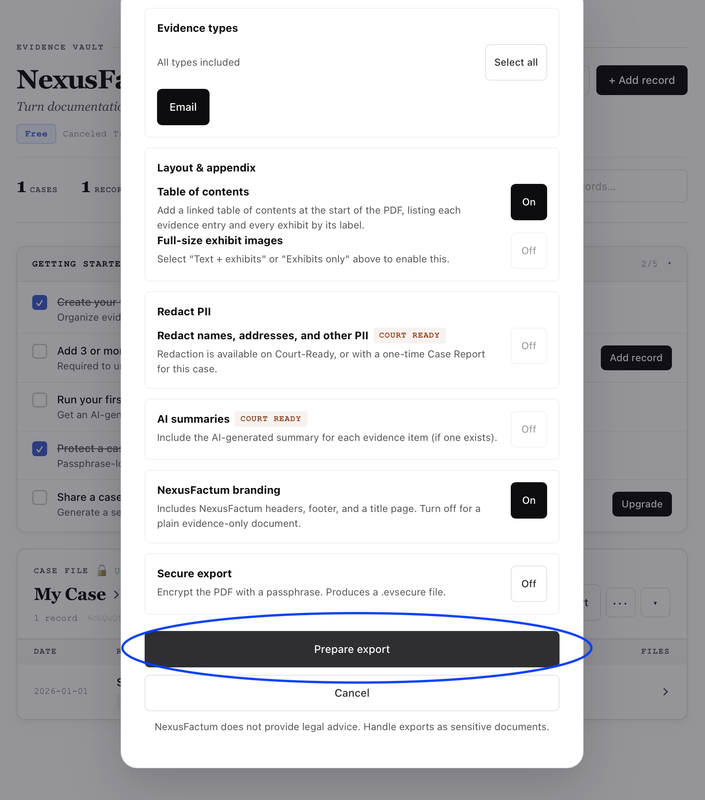
Set whatever options you want, then click Prepare export at the bottom.
The PDF builds in the background — you can keep working elsewhere in the app while it runs. A progress bar in the bottom corner tracks it, and larger cases with a lot of images take longer since each one gets processed individually. When it's done, click Download to save the file.

The build keeps running even if you navigate to a different case or page while you wait — it won't restart or get lost.